How to connect a camera to a telescope
I recently had someone ask me how to connect a camera to a telescope. I answered him by e-mail, but then I thought that it would be a good subject for a blog entry. Fortunately, taking photos through a telescope is not at all difficult, but it does involve a couple of pieces of equipment that photographers may not be familiar with.
First, some definitions. There are several ways to attach a camera to a telescope. Prime focus attaches the camera directly to the telescope, turning the telescope into a great big camera lens. Afocal photography positions the camera, with its lens attached, at the eyepiece; this is done either freehand (holding the camera up to the eyepiece), through an adapter that connects the eyepiece to the camera, or through a mount that holds the camera in place in front of the eyepiece. Finally, eyepiece projection keeps the telescope eyepiece but removes the camera lens: the eyepiece projects the image directly onto the camera’s sensor; an adapter like this one connects the two.
| Method | Equipment (not including adapters) |
|---|---|
| Prime focus | telescope → camera |
| Afocal | telescope → eyepiece → lens → camera |
| Projection | telescope → eyepiece → camera |
(A good discussion of these different methods can be found in Michael A. Covington’s Digital SLR Astrophotography: Amazon.ca, Amazon.com.)
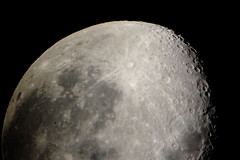
 Most of my experience is with prime focus photography, as are most of my photos (this one, however, is an example of afocal photography: I held the camera up to the eyepiece). If you’re using a pocket digital camera rather than a digital SLR, you’re probably looking at afocal photography, and using a mount like this one to hold the camera up to the eyepiece. But there are some exceptions: if your non-SLR digital camera has filter threads, like the old Nikon Coolpix 990 series, you can, for some eyepieces, get adapters that screw into the camera lens on one side and the top of the eyepiece on the other; Tele Vue, for example, has adapters that screw onto their Radian eyepieces.
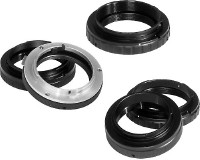
 Whether it’s prime focus or eyepiece projection — or, in some cases, afocal photography — if you’re using an SLR, digital or otherwise, you’re going to need a T-ring. Every make of SLR has its own proprietary mount; a T-ring is an adapter that gives the camera a standard connector at a precise distance from the sensor. Covington has a good explanation:
Originally designed for cheap “T-mount” telephoto lenses in the 1960s, the T-ring is threaded 42 × 0.75 mm so that other devices can screw into it, and its front flange is always 55 mm from the film or sensor. (Digital SLR Astrophotography, p. 53)
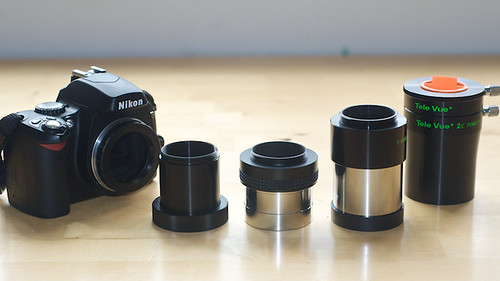
There are T-rings for practically every camera. Orion, for example, sells them for Nikon, Canon, Pentax, Olympus and more. Once a T-ring is attached to your camera, you can then connect it to any other adapter that is threaded for T-rings. The T-ring is essentially a universal astrophotography adapter: if you can find a T-ring for your camera, you can connect it to anything.
 Camera adapters for two-inch focusers and Schmidt-Cassegrains connect to T-rings; I have one of each. This is how I’ve been connecting my Nikon digital SLRs to my telescopes. It’s also possible to connect to a 1¼-inch focuser using Orion’s universal adapter. Some afocal adapters are also threaded for T-rings. And, as I’ve mentioned before, Tele Vue’s Powermate has an optional T-ring adapter that greatly simplifies inserting a Powermate (which multiplies the magnification and focal length) between the camera and the telescope: I would otherwise have had to insert a two-inch camera adapter into the Powermate, then connect that to the camera’s T-ring. The Powermate’s T-ring adapter really reduces the amount of gear hanging off the back of the telescope.
The T-ring-plus-adapter combination is the only way to connect an SLR directly to a telescope for prime focus astrophotography. Fortunately these two pieces of equipment — which are basically big dumb hunks of machined metal — are inexpensive and very easy to come by.
